I just wanted to post a short note. Due to my heading home to be with my Dad for his last few hours and then going through a funeral with all its attendant parts I have no article to post this week on my lathe restoration project. I will be staying with Mom for a little while more so I do not expect to post again for another 2 weeks. Until then stay safe and and enjoy being with your loved ones since time is to short.
Sunday, 20 October 2013

Sunday, 13 October 2013
Well the roller coaster ride continues. Dad was sent home last week Sunday and by Friday was back in the Hospital. Still not sure as to how much time he has left. Went home last week Saturday and spent 4 days at home to be with them. Came back home on Tuesday to go back to work since in reality there was nothing I could do there. Unless something drastically happens in the next few days will stay at home till this coming Saturday when I start 10 days vacation and will go home to help out as much as possible.
While I was home this week I managed to do a few small items. First the Taper attachment as mentioned is all cleaned up and ready to go. Here is a picture of it laying on the bench awaiting install.
 Now lets get on to the new stuff we did this week. On top of the gear housing are three gears that translate the power from the headstock to the gearing section. The first gear sits on a shaft where it can move in and out 5/8" so that it can either engage the rest of the gears or not. The picture below shows this gear assembly.

The screw head you see has a hole through the centre that allows a pin with rounded ends and spring assembly to ride inside the shaft of the gear housing. There are two grooves inside this shaft to catch the rounded ends and essentially behave as parking slots to hold the gear in that location. The two locations are either engaging the rest of the gears to the bottom left or not engaging the gears. When this was taken apart earlier it was noticed that the pin had lost one rounded end. I therefore had to make two pins such that one slides inside the other and the original spring was reused to force these two pieces apart when they were in the shaft of the screw. The original piece was some how secured such that you could remove the pin and it stayed in one piece. Mine is a little simpler and when you remove it you need to be careful since the parts can come apart. Here are a couple of pictures one showing the gear, original pin, and screw head. The second showing a closeup of the original pin and you can see the one end is not rounded anymore. The third picture shows the two new parts, minus the spring, that slide inside one another. The picture above this paragraph actually shows the pieces back on the lathe, and working as it should. Turning these two items was interesting in that they are quite small.




Well tomorrow is Thanksgiving here in Canada and it's a holiday for us Canucks. My guess is that I will most likely spend a little bit of time in the shop working on the Tailstock for the remainder of the week. I hope those Canucks reading this enjoy your Thanksgiving Turkey and for all you Americans it's just around the corner for you. As for the rest of the world you can have turkey whenever you want. It's good all year round. All the best and enjoy the fall weather. It's been great up here so far.
Harold
While I was home this week I managed to do a few small items. First the Taper attachment as mentioned is all cleaned up and ready to go. Here is a picture of it laying on the bench awaiting install.


Next I decided to start working on the locking collar that sits on the extension to the leadscrew under the gearing section. Here is that same collar on the #39 lathe that I will need to duplicate.

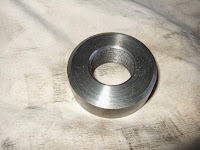
This collar is approx 2" in dia by approx .650" thick. I had no 2 inch stock in the garage so had to turn down a piece of three inch to the required diameter. Once that was done I drilled out as much as I could with drill bits on hand and then parted off the piece to the correct thickness. Once the part was removed I placed it back in the lathe and proceeded to bore out the hole until the appropriate size was acquired to allow me to thread it for the 1" by 26tpi thread that is on the shaft. I finished that all, and was going to go to the mill to start boring out the holes for the retaining screws when I realized I have not yet bought a vise for the Van Norman milling machine. I've been actively trolling Ebay and other sites hoping to get an actual Van Norman vise to go with the machine but so far no luck. I guess this weekend when I drive home will stop by KBC tools and pick one up. I leave you with two pictures of this part. One while still in the lathe and being turned down to correct diameter and the second when it was done and awaiting milling.


I also took the time to install the change gear bracket which we had cleaned up last week and started painting. Here is a picture of it back in place.

Last thing I did this week was machine a shoulder bolt and nuts for attaching the forward/reverse pivot arm to it's retaining bracket below the gear housing. This was a fairly routine piece as long as you measured twice to ensure you had the right length for the shoulders otherwise you might compress the bracket and prevent the lever from working smoothly. Here are two pictures one showing the bolt and nuts after machining, and to be reasonably authentic they are 5/16" by 26tpi which was common on this lathe. Second picture shows the bolt installed and working as it should.


Well tomorrow is Thanksgiving here in Canada and it's a holiday for us Canucks. My guess is that I will most likely spend a little bit of time in the shop working on the Tailstock for the remainder of the week. I hope those Canucks reading this enjoy your Thanksgiving Turkey and for all you Americans it's just around the corner for you. As for the rest of the world you can have turkey whenever you want. It's good all year round. All the best and enjoy the fall weather. It's been great up here so far.
Harold
Sunday, 6 October 2013
Well unfortunately its been a bit of a roller coaster week for me. Early this week I learned that my Dad was admitted to hospital with what they thought might be a small issue resulting in a lack of energy and low blood iron count. Unfortunately within 24hrs he and Mom were given the bad news that he has advanced cancer in the region of the liver, stomach and intestines. Tests and biopsies were taken but it will still be a week before we hear the results. At this time I'm staying with them for a few more days before I go back home.
With this in mind I did not have a lot of energy to do much new work on the lathe. All I ended up doing this past week was finish cleaning and painting the Taper attachment assembly. This item was actually in pretty good shape. A thorough cleaning and a little filing on the main bar to allow the slider to slide smoothly was all it needed. I won't be able to test it for a while but it looks pretty good. I also completely took the gearing end apart again to slide in the two brass washers I made earlier. This is now all back together and seems to work pretty good as well. Of course until the headstock is installed and everything is turning we cannot be 100% however it looks and feels good.
Well until next week all the best.
Harold
With this in mind I did not have a lot of energy to do much new work on the lathe. All I ended up doing this past week was finish cleaning and painting the Taper attachment assembly. This item was actually in pretty good shape. A thorough cleaning and a little filing on the main bar to allow the slider to slide smoothly was all it needed. I won't be able to test it for a while but it looks pretty good. I also completely took the gearing end apart again to slide in the two brass washers I made earlier. This is now all back together and seems to work pretty good as well. Of course until the headstock is installed and everything is turning we cannot be 100% however it looks and feels good.
Well until next week all the best.
Harold
Saturday, 28 September 2013
Well it's another week and another installment of the voyage to rebuild this old lathe. We had a nice week here such that I could work in the garage after work with the door open watching the neighbour kids play around and the sun slowly set on the horizon. Well actually have to go around the corner of the garage to see it really set however you get my drift. Spent the majority of the week working on cleaning and prepping the whole speed gear assembly. This is a small housing on the left side of the lathe that includes a Slow/Medium/Fast selection as well as the forward and reverse gearing. Here are a couple of before pictures that I took so as to have visual record of where everything went before I stripped it down.


Again almost all the parts are there, just dirty and some with a little coating of rust. As I work on this lathe I have come to realize that when I worked on the first lathe I missed a few oiling holes. I've come to the realization that if there's a hole in the casting fill it with oil. It will go somewhere to lubricate something. It's possible I was just a little anxious on the first one and went a little faster to be able to see the end result however with this one I'm going a little slower and I'm also more cognizant of where oil should be and therefore trying to ensure I have a clean gallery for it to get there. Another thing that came up was that either I'm unlucky with these two machines or there is an inherent weakness in the design of the three speed gear lever. On my #39 lathe this gear lever had been brazed back together and on this lathe the gear lever has also been brazed back together. Here are a couple pictures showing the repair job on the gear lever. I think if I ever get really ambitious I might pull this part apart again and try and make some drawings to make a pattern for this so as to cast some replacements.


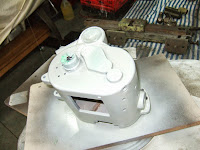
Also heres a little description of the cleaning I'm doing. On the large items I use paint stripper to get rid of the majority of the old paint. Then all the parts go into a large pail and soak in varsol before I pull them out and finish the cleaning. Once they've been cleaned of gunk and old grease and oil I use a small wire wheel on my Foredom flexible shaft grinder to clean all the rest of the rust and paint away. I only do this on the cast surfaces and non critical machined surfaces. All critical bearing surfaces get cleaned and then I use either a scotchbrite pad or brass bristle brush to clean these surfaces. Then once it's all clean I tape it up and spray primer and then paint on the cast surfaces. All machined surfaces get a light coat of spindle oil to protect from flash rusting. Here's just a sample of one piece that is halfway through the cleaning process. Stripped on the right and still painted on the left. As well we also have a couple of pictures showing parts with primer and paint



Towards the end of the week I also started on cleaning the Taper attachment I purchased recently. On every major part of the assembly is stamped a #30 so at one time this taper assembly belonged to Lathe #30. Greg assures me that the lathe body that this came off of has either a #80 or #83 stamped on the end. The last digit is hard to read. So at one time either the previous owner of that lathe rebuilt it with parts from another lathe or he purchased someone else's Taper attachment either because he lost his or it broke on him. I guess without a time machine we'll never know. (where is HG Wells when you need him) Here are a couple of pictures showing various parts of the Taper attachment drying after receiving a coat of primer.


Again almost all the parts are there, just dirty and some with a little coating of rust. As I work on this lathe I have come to realize that when I worked on the first lathe I missed a few oiling holes. I've come to the realization that if there's a hole in the casting fill it with oil. It will go somewhere to lubricate something. It's possible I was just a little anxious on the first one and went a little faster to be able to see the end result however with this one I'm going a little slower and I'm also more cognizant of where oil should be and therefore trying to ensure I have a clean gallery for it to get there. Another thing that came up was that either I'm unlucky with these two machines or there is an inherent weakness in the design of the three speed gear lever. On my #39 lathe this gear lever had been brazed back together and on this lathe the gear lever has also been brazed back together. Here are a couple pictures showing the repair job on the gear lever. I think if I ever get really ambitious I might pull this part apart again and try and make some drawings to make a pattern for this so as to cast some replacements.


Also heres a little description of the cleaning I'm doing. On the large items I use paint stripper to get rid of the majority of the old paint. Then all the parts go into a large pail and soak in varsol before I pull them out and finish the cleaning. Once they've been cleaned of gunk and old grease and oil I use a small wire wheel on my Foredom flexible shaft grinder to clean all the rest of the rust and paint away. I only do this on the cast surfaces and non critical machined surfaces. All critical bearing surfaces get cleaned and then I use either a scotchbrite pad or brass bristle brush to clean these surfaces. Then once it's all clean I tape it up and spray primer and then paint on the cast surfaces. All machined surfaces get a light coat of spindle oil to protect from flash rusting. Here's just a sample of one piece that is halfway through the cleaning process. Stripped on the right and still painted on the left. As well we also have a couple of pictures showing parts with primer and paint


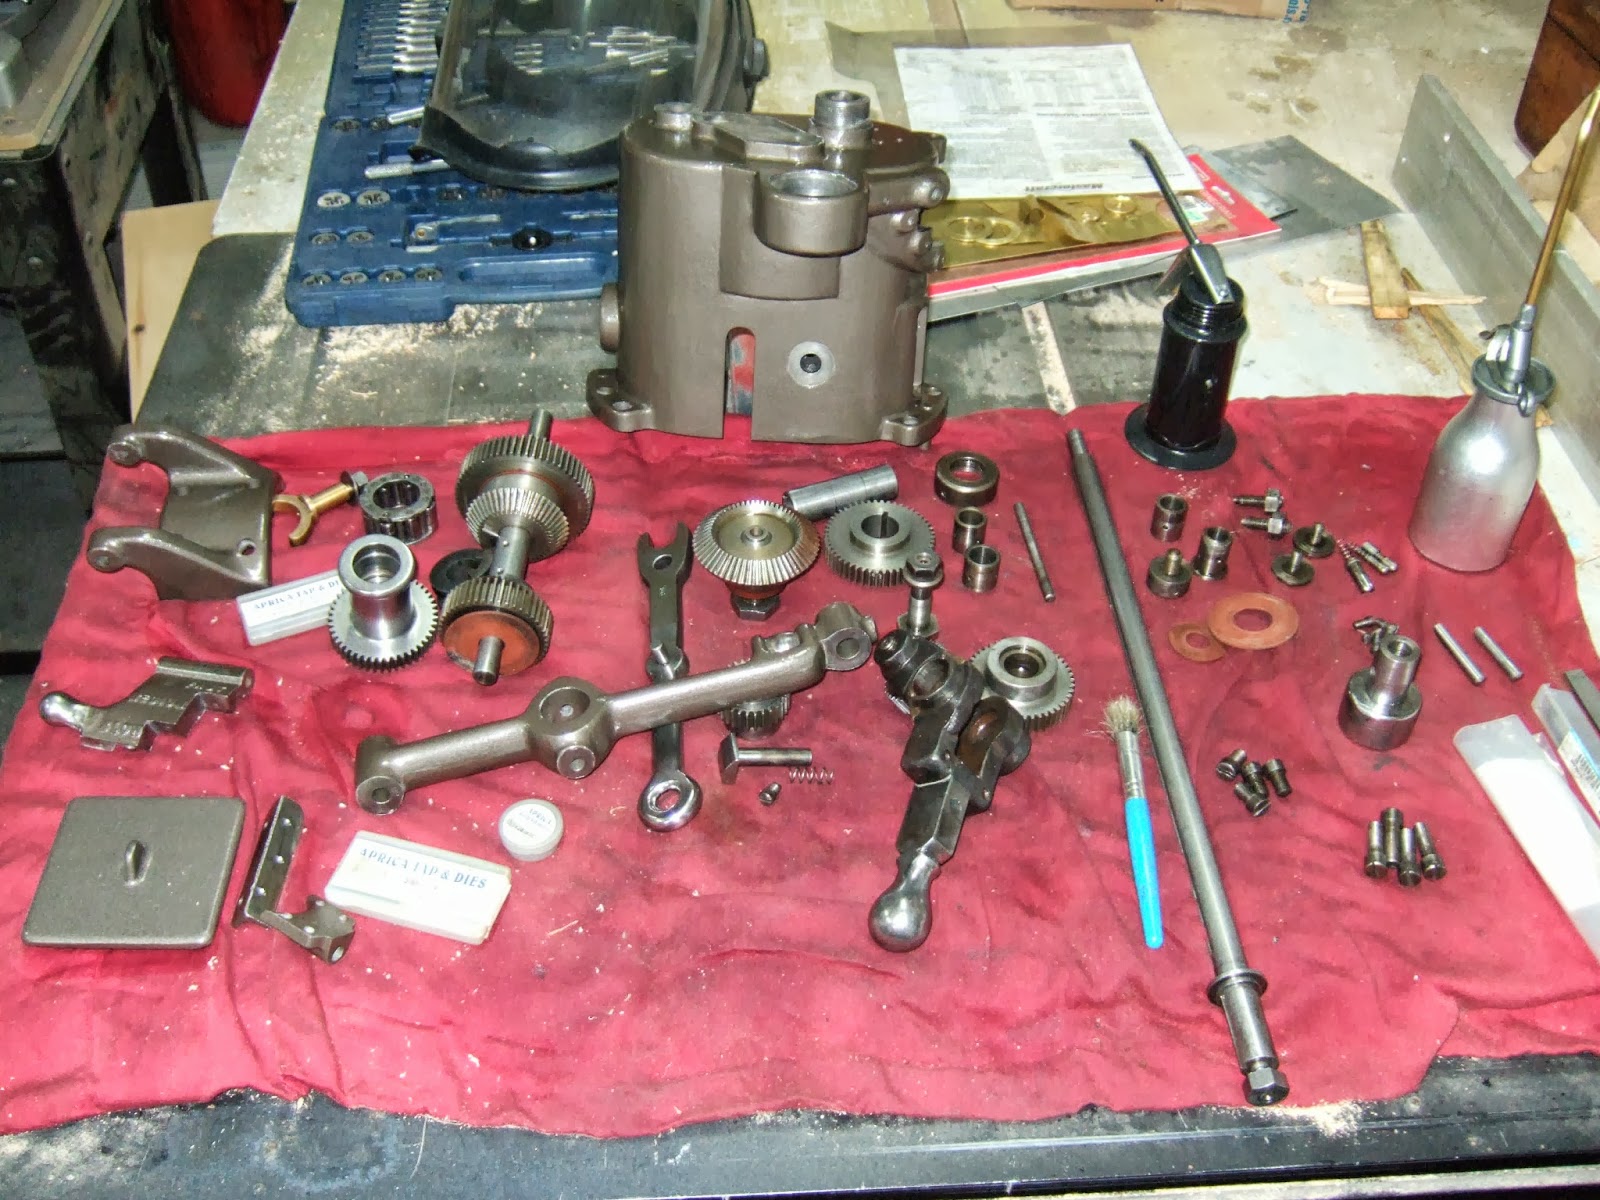
Of course once everything is cleaned and painted, well then we've got to put it together again. Just to show you what we're up against here is a picture of all the parts from the Gear housing assembly. However once it's all back together it looks like the second photo which shows the assembly back on the lathe. It still needs some tweaking and installation of a couple of parts but the majority is there and there was only one requirement to remove and reinstall when I realized I had one of the bearing bushings installed backwards. On this assembly the only things missing were the split lock nut that goes on the leadscrew extension and the bolt and nut that holds the forward/reverse lever in place at the bottom of the arm. Just below the middle of the second picture where the arm touches the edge of the photo.

Towards the end of the week I also started on cleaning the Taper attachment I purchased recently. On every major part of the assembly is stamped a #30 so at one time this taper assembly belonged to Lathe #30. Greg assures me that the lathe body that this came off of has either a #80 or #83 stamped on the end. The last digit is hard to read. So at one time either the previous owner of that lathe rebuilt it with parts from another lathe or he purchased someone else's Taper attachment either because he lost his or it broke on him. I guess without a time machine we'll never know. (where is HG Wells when you need him) Here are a couple of pictures showing various parts of the Taper attachment drying after receiving a coat of primer.


Over the coming week I will try and finish the Taper attachment and then look at machining the 4 bolts required to attach it to the lathe as well I need to machine another setscrew for the gearing assembly mechanism. Finally will need to machine up a split nut that needs to be installed on the extension of the lead screw where it comes out on the left side of the change gear assembly.
Once the whole assembly was installed I played with the change gear lever and I definitely need to keep pressure on the lead screw, to the left, to prevent the gears from grinding. With this pressure placed on the shaft it again shows the gap by the "U" shaped spacer in the change gear assembly. I might still take the whole contraption apart and at least insert one brass washer and then bolt it together and see what the result is. I really do not like seeing that space there. I'll let you know next week what happened with this.
Finally last week I asked if anybody from Casa Grande was reading this. I am still hoping for somebody from that town to respond however I did manage to track down a person who used to live there for 20 years. With his help I think we've possibly narrowed down the building that Mr Potter from Practical Machinist believes houses another one of these lathes. I hope over the next week to try and see what luck I might have in tracking down the owner of the property. If I do I will see if he is willing to give us pictures and history on that lathe. Wish us luck. And as mentioned last week if you own one of these lathes or know somebody who does please if you haven't contacted me please do so.
See you all again next week. Lets also hope this nice fall weather stays around for awhile.
Harold
Subscribe to:
Posts (Atom)