

One big reason for this was the ability to braze repair the missing teeth on the back gear and the large gear on the headstock. The back gear is missing 2 teeth approx 180deg apart and the large gear on the headstock is missing one tooth. The plan is to drill into the gear two holes for #10-24 set screw. Screw the two set screws in and then braze around them to fill in where the tooth would be. Once cold clean up the area, grind down the excess braze and then carefully groove out either side of where the teeth would be and then mount the gears in the milling machine and using the proper involute cutter cut new teeth as required. I have one of the two involute cutters here just awaiting delivery of the second one. Here is a picture showing the back gear and the set screw sitting on it. It is not installed because I am waiting for the local Fastenal office to order in a #10-24 bottoming tap.

Last week I mentioned that I was missing a few plates for the Van Norman Dividing head I have. Well over the past little while I've been talking to a fellow in the USA who had a webpage talking about these dividing heads. I had asked him if he had extra plates since he had discussed having a few machined up. Well in conversations he mentioned he did have some however he was waiting to machine up one more set.
Once that was done he would ship me a pair of dividing plates. Well this week was like Christmas, the brand new dividing plates showed up and so far he is refusing my offer of payment for these plates. I am definitely thankful for his generosity. With these two plates and the one I had previously I now have all I need to use this dividing head to repair and manufacture all the gearing for this lathe. Here is a pictures of the two dividing plates he sent me.

In order to use these plates I also spent some time cleaning the Dividing head. A previous owner had I believe lost the spring clip that holds the sector arms in place. He therefore milled up a replacement setup that unfortunately did not allow complete movement of the sector arms. Here are a few pictures that I'll talk about.


First picture shows the aluminium piece a previous owner made on the left, the washer on the right is what I am going to use to make a spring clip. I should actually have a larger washer or piece of steel but this is all I had at the time. I cut it out to the shape of a horseshoe. Once it was cut to the right size I bent the two arms both up and down into wavy motion so that once it was in the groove the clip would stay in place. In the third picture you can kinda see the wavy shape I bent into it. In the fourth picture you can barely see the clip and then the screw head that secures the one sector arm to another so they move around the central point together. Previously the aluminium piece was not allowing the screw to go around it. Some day I will get a larger piece of metal and make the clip larger so that it places pressure in more spots on the sector arms however for now it works.
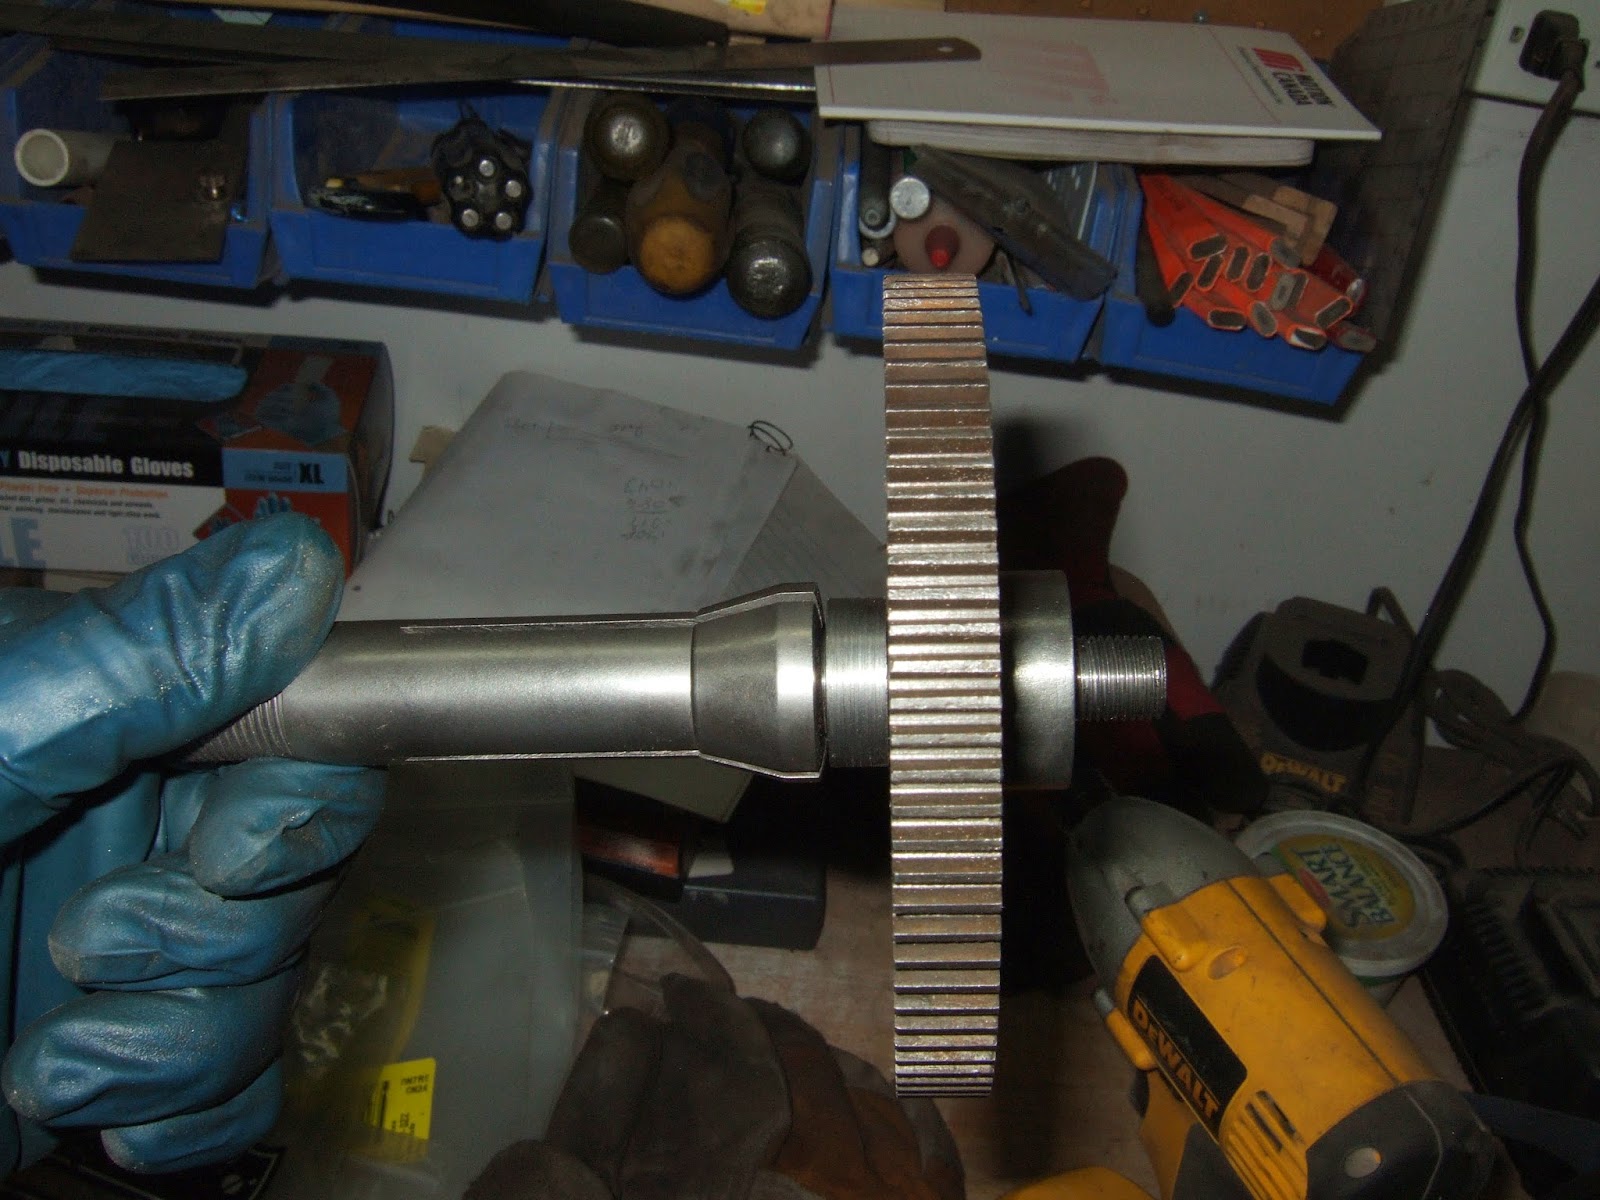
Last thing I did this week was make a homemade mandrel to mount the gears on when I cut the repaired teeth out. I have a complete set of collets for the dividing head with the largest collet being 5/8". So found a piece of scrap round stock and proceeded to machine it down. On one end I have 5/8" dia to fit in the collet and on the other end I have a .685" dia to accept the gears. That end is 1" long so that I could fit two gear blanks on there when cutting new gears. I then turned down the last 3/4" of the shaft to just under 1/2" and threaded it to accept a 1/2"-24 nut to hold the gears in place. The last thing I need to do is cut a groove in the shaft to accept a 1/8" keyway. Will need to order in a 1/8" woodruff cutter to be able to cut this groove and then she'll ready to work. Here are a couple of pictures, one showing the mandrel alone, the other where I have it mounted in the collet and placed a gear on the mandrel so you can see how it would fit together.

Well that's all for this week. I do hope to post again next week however I will state that with my imminent retirement from the Military and working on selling this house and buying one in Niagara-on-the-lake there will be times when I have nothing to post. There will also come a time when I start moving my tools to the new location. When this happens I hope to advise those reading this blog so they realize that I will be on Hiatus probably for most of the late spring and into the summer time period. However until this happens I still hope to be able to post of the trials and tribulations of rebuilding this antique lathe.
Harold
No comments:
Post a Comment