Spent some time in the shop working on refurbishing the tailstock for the #86 lathe.
I'll start by showing you some pictures of the tailstock before it was taken apart.


The tailstock was in pretty good shape at least looking from the outside. However once we started taking it apart some small issues came up. First thing I'll say is that this tailstock was assembly #78 which by my thinking means it came from lathe #78 however that may not be the case either since some other assemblies don't seem to match up with the lathe serial numbers. However here are two pictures showing the tailstock serial number


Now when we started to take the tailstock apart the first issue was noticed. The tapered spreader bar which you see above with the serial # stamped in it was cracked by one of the clamping holes. Thankfully this looks worse than it actually is. The bar still can be secured in place and the two pieces will actually stay locked together due to the type of break it is. Here is a picture of what I mean.

You can also start to see the effects of the second problem. The second issue was the beginning of rust wherever there was metal to metal contact. The picture above shows the rust under where the spreader bar would be and the picture below also shows the rust that was found when I split the tailstock in two pieces. This picture also shows where there were 4 pieces of shim stock used to raise the tailstock to bring it into alignment with the headstock.
Thankfully all this could be cleaned up with a razor blade and some fine sandpaper. Once everything was stripped down to their component parts we could start cleaning them as well as painting any parts that needed it. Once that was done we could start putting it back together. Here you can see a picture of most of the parts waiting to be reassembled.

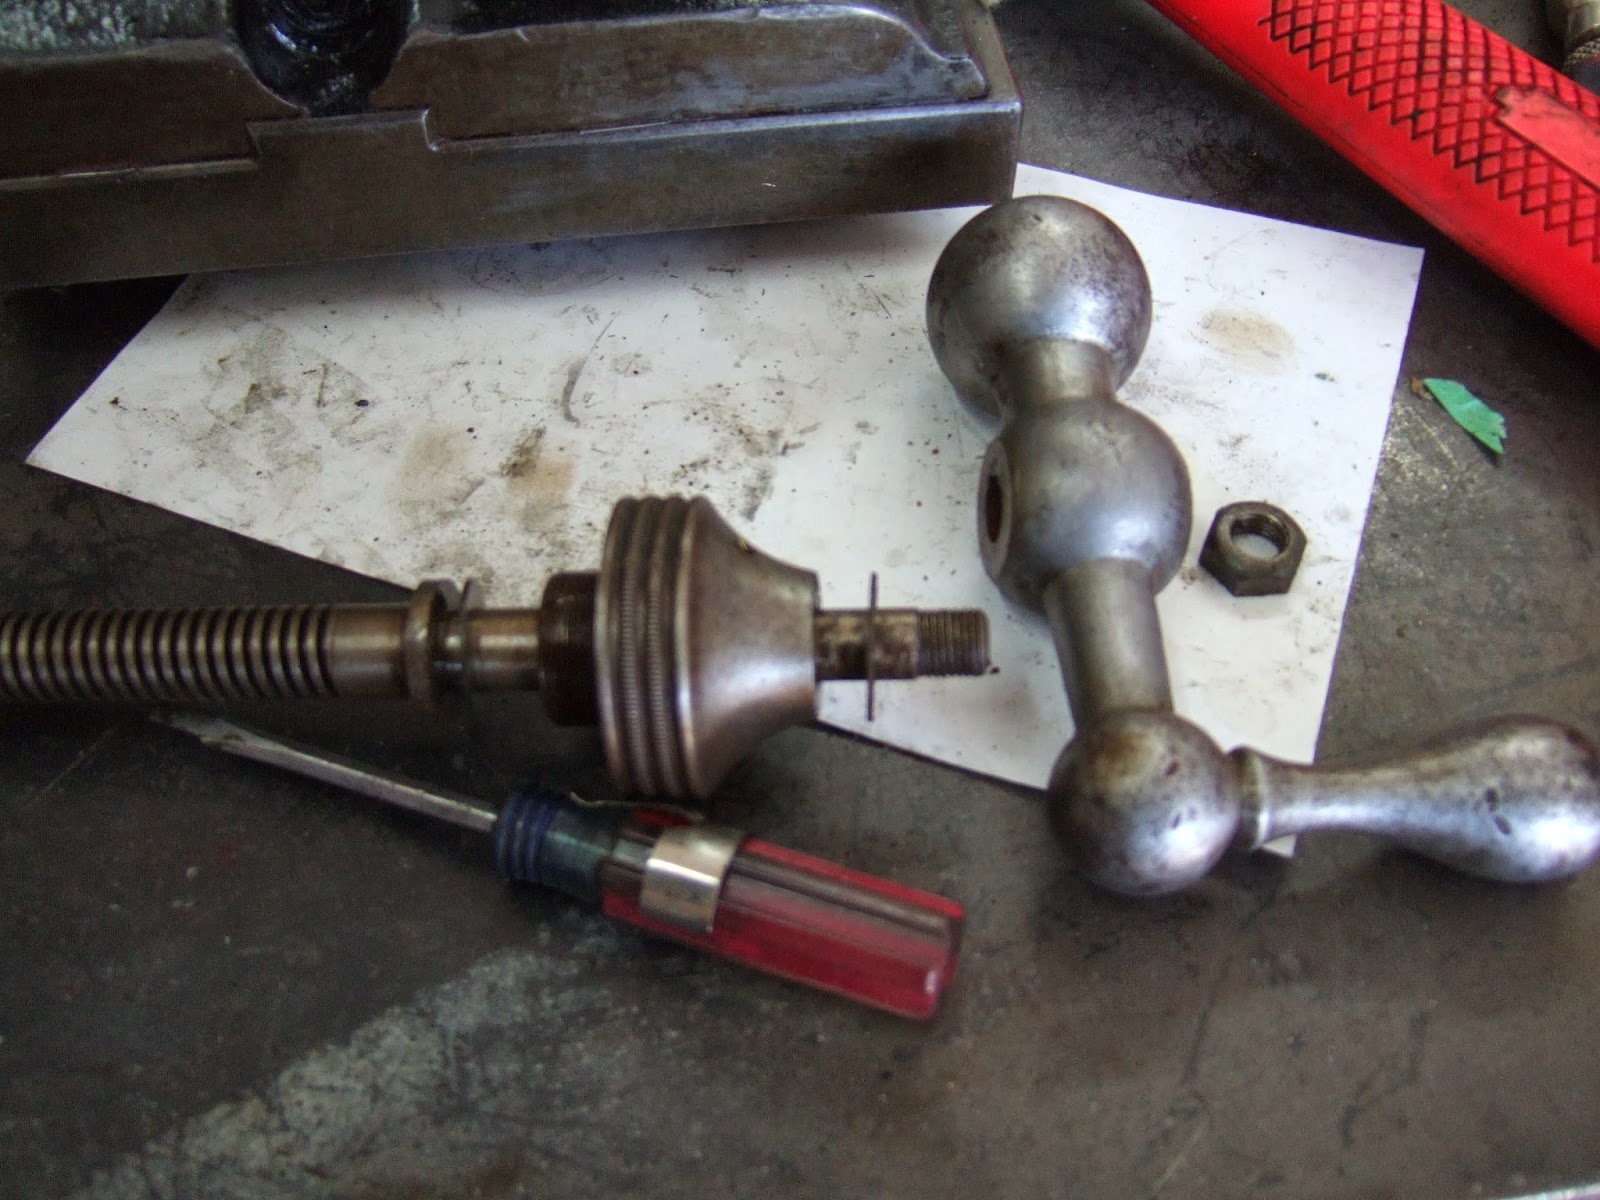
Part of cleaning and prepping the parts also entailed polishing any bare metal that would remain exposed and would not get a continuous coating of oil. I was quite happy that when we put it all back together the tailstock ram has negligible slop for a tool this old. Just for ref here is a picture of the parts of the ram mechanism.

The last thing I'll talk about is what I call the cross slide bolt. This bolt moves the top of the tailstock in or out to line it up with the headstock. On the # 39 lathe there were two screws one in front and one in back that you threaded either in or out to move the tailstock in or out for lineup. On this lathe there was a long bolt with a allen nut threaded in the end. I knew that this could not be original so contacted another Lathe owner to see what he had. He advised me that his bolt was longer than mine and had a nut on the end where I had the allen nut. Here is couple pictures of this bolt.


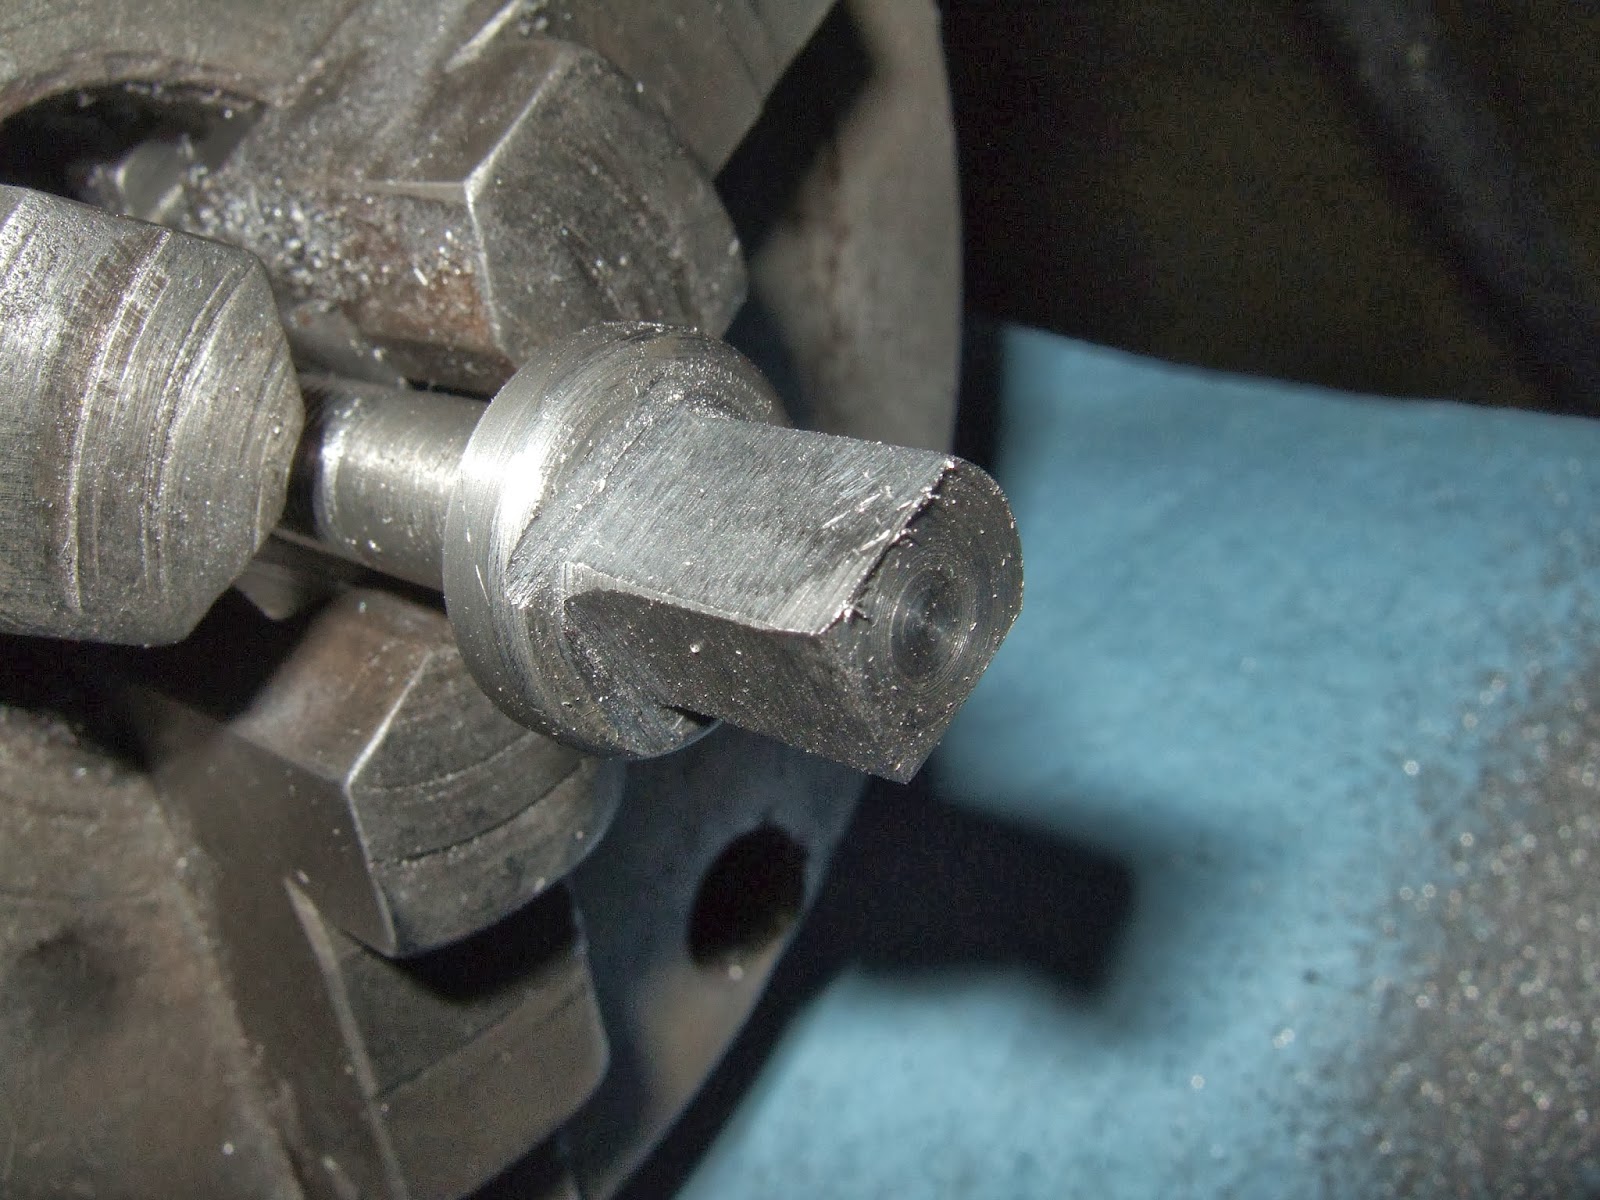

The first picture is the original bolt, the allen nut was threaded in the left end. There should have been another 3/8" of shaft and it should have been threaded to accept a nut. Now by turning the bolt and either loosening or tightening the nut you move the top part of the tailstock in or out. Tightening and loosening the bolt and nut have to be done together to get the operation to work. The second picture shows the beginning of the new bolt and the original one above it for reference. You can see the new bolt is longer and has 5/16" threading on it to accept the nut. The third picture shows the bolt in a sacrificial nut that I made to be able to hold the bolt while turning the other end. The fourth picture show the results of filing down three sides to make a square bolt head, still need to file the fourth side. The fifth picture shows the completed bolt with the new nut lying above it and the original bolt lying below the new bolt. Once installed it all worked like it should. Once everything was together I placed it on the lathe and here are some pictures showing it mounted on the lathe.


There are only two things left to do. One make a brass dauber that fits in the hole on the back of tailstock and two once the headstock is installed find out the height difference between the head and tailstock and reinsert shims to bring the tailstock into alignment with the headstock vertically. Of course we'll also have to loosen up the cross slide bolt and adjust the tailstock in the horizontal plane as well.
Well until next week have a great time
Harold
No comments:
Post a Comment