I believe I had a pretty good week in the shop even with an issue which I'll talk about later. Essentially by the end of the week I had the QC gearbox assembly apart, cleaned and put back together again. Here's what we went through.
After taking everything apart last week and cleaning and painting the gearbox casting the first part we worked on was the gear change handle and assembly. This item was in very good shape and all we did was strip it apart, clean all the oil chambers and the assemblies, polish the handle and indicator and then put it back together again. The following two pictures show a before and after.


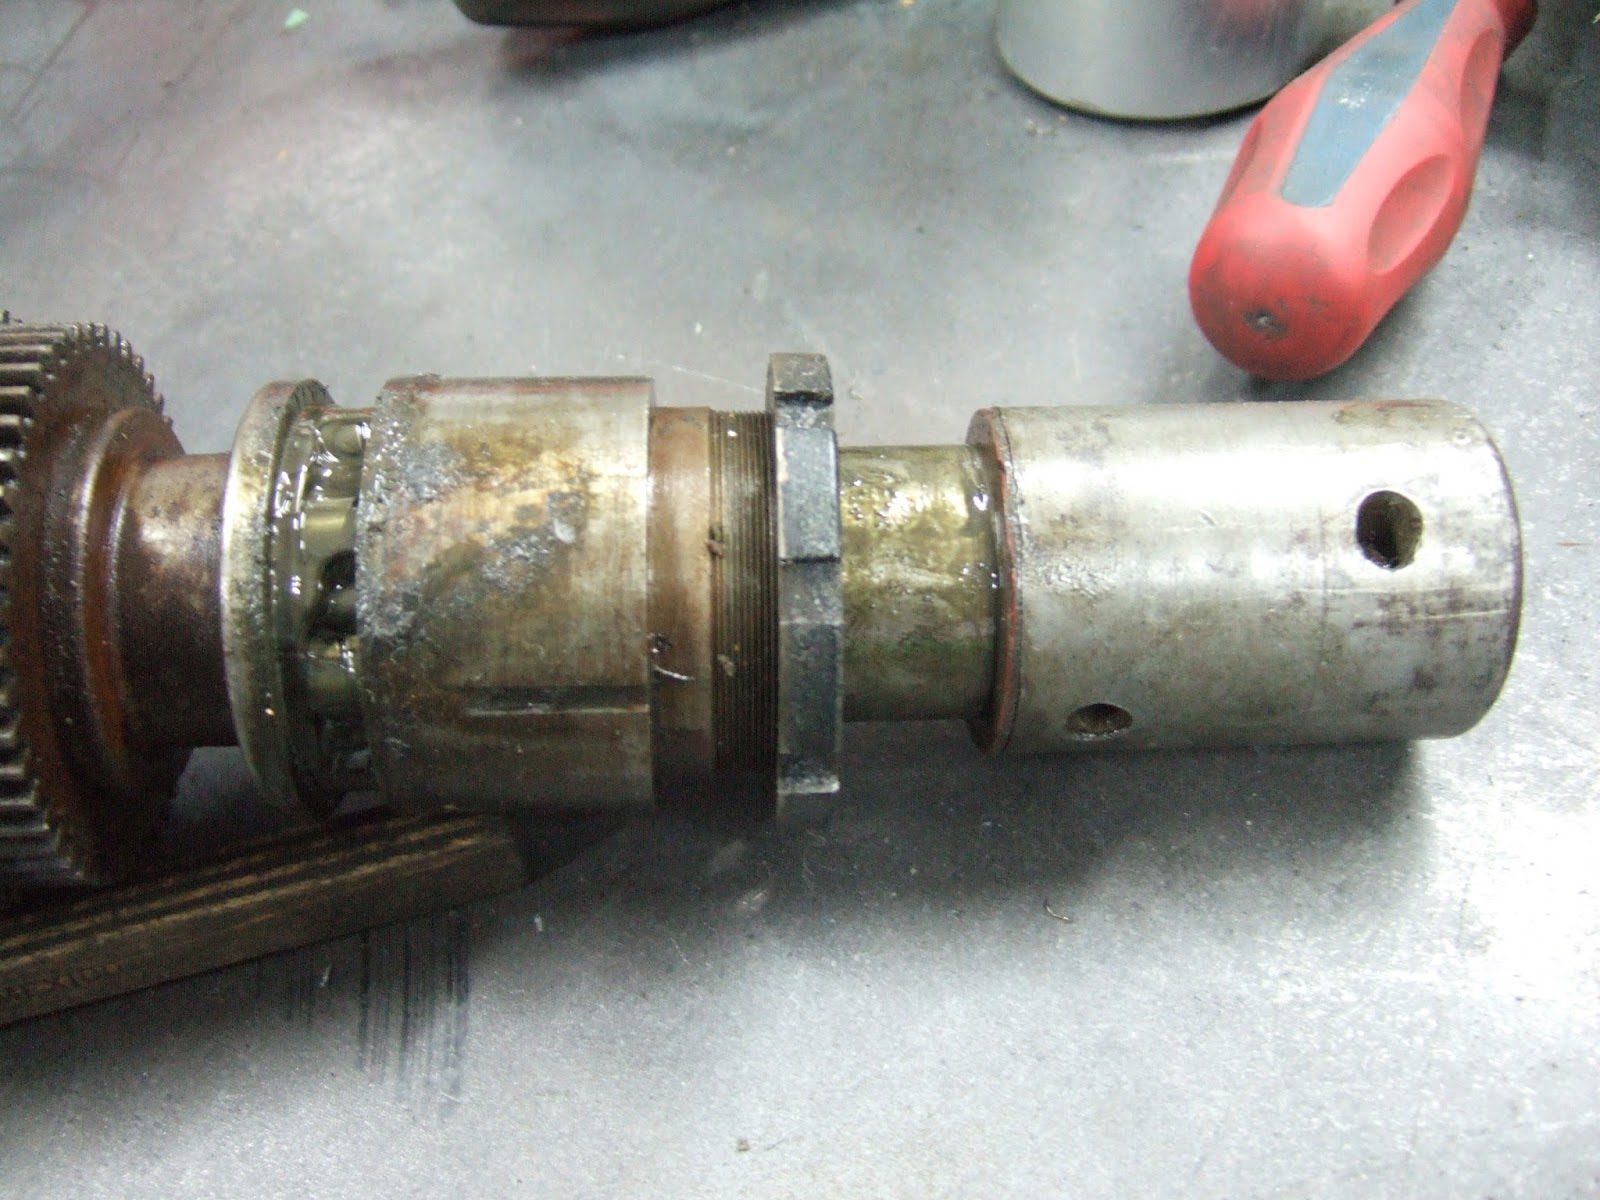
Once all the parts were cleaned thoroughly it was time to fit them back in the casting which by now had been painted. This is where I came across a problem. I did not notice this earlier however once all the parts were re-installed I had a 70 thous gap between the bearing sleeve which was secured in the casting and the remainder of the parts. In the first picture below you can see the gears on the left, then the U shaped spacer, and then the roller bearings are inside the holder which is in the casting and secured by the nut on the right side of the casting. Next is the transition piece with a fibre washer which is red in colour. You can see the gap in the first picture but the second picture shows it even better. As well you can see in the second picture that the holes are pretty closely aligned for the taper pin. In the third and fourth picture you can see that with the taper pin in place if I slide the shaft to the right which would occur when tightening the assembly, with parts still to be installed, then the gap moves to the inside of the casting where the nested gears sit. The issue with this is that the gap could end up being on either side of the U shaped spacer depending on where it sits. If the gap is on the left of the U shaped spacer then you can start to see the roller bearing races. This would not be a good situation in that if any dirt got inside it would be able to migrate to the roller bearings. After discussions with some other QC owners I decided to make a few brass washers from 30 thous brass I had lying around. I would then install this between the U shaped spacer and the nested gears and hopefully take up most of the gap. The reason for placing the washers between the U shaped piece and the nested gears was that this location did not affect the workings of the gear handle. Had the washers been on the outside of the casting they would have moved the entire nested gear assembly 60 thous toward the tailstock end of the lathe and the gears would not have meshed properly. By keeping the washers inside the gears still mesh. As well by keeping the washers between the U shaped spacer and the gears meant that the other end of the spacer still could be used as it was designed as a seal for the pocket for the roller bearings thereby preventing the ingress of dirt.


To make these washers I clamped a piece of brass onto the drill press and used two different sized hole saws to make the washers. Then I used the dremel tool and some sandpaper to smooth them down. Here are two pictures of the process. In the first picture you can see the effect on the wood of first using a 1" hole saw to cut the ID and then a larger hole saw to cut the OD. Both drills were used without moving the brass thus giving me a rough but usable washer which can be seen in the second picture. As mentioned some sanding and it was good to go.


Once this was all done it was time to put everything back together. Once it was installed with the washers I still had a very slight gap and everything turned quite smoothly. All that's left is to await the arrival of the spiral taper reamer and a few #5 taper pins so that I can securely mount the transition piece back on. In the first picture below you see all the parts lined up awaiting installation with the two washers leaning against the shaft and in the second picture everything is installed with the two washers installed between the gears and the U shaped spacer. Everything was well lubricated and turning smoothly.


Also during the week I painstakingly painted the numbers on the door of the gearing section. Here's a picture of the door with the Thread numbers painted in read on it.

As most of you who follow this probably know I do not have all the parts for these lathes. I've had castings made for some parts and some parts will most likely have to be made as time goes by. One of the items missing was the taper attachment. On the #39 lathe I have the base of the taper attachment but nothing else. One of the other QC members out there also has two of these lathes however the second one's bed was chewed up badly by a welding torch and was unrecoverable. Therefore he stripped as many parts as he could of this lathe for future needs. One of these items was the taper attachment. Recently he sent me a picture of his lathe as well as some of the items from the other lathe which included the parts from the taper attachment. I expressed an interest in getting this part and he agreed to listen to my offer. Well I took a closed look at the picture and the original picture of the taper attachment in the 1919 manual and low and behold he had the entire contraption minus a small two pin tool to thread some "button bolts" in . I thought to myself wait a minute I have that wrench. Sure enough I have the wrench and possibly a handle for the Taper attachment so I had to offer a price that he accepted so I could have the entire Taper assembly for one lathe. Once I receive the assembly I will look at possibly trying to replicate the parts needed to complete the taper assembly for the #39 lathe. Just for giggles here's the lonely wrench that forced me to buy the rest of the assembly so they could all be together again.

Well that's all for this week in regards to working on the lathe. I do have a request though for the readers out there. If anybody knows of anybody who owns one of these lathes please talk to them and see if they're in contact with me. If they're not please show them this blog and ask them to contact me via the comment section below. As well if anybody reading this is from the Casa Grande area of Arizona please contact me as well. We believe there might be one of these lathes located in an abandoned building in your area. Finally if anybody out there is interested in one of these lathes there is one for sale in the Ohio area. Just leave me a comment that you are interested and I will hook you up with the seller.
I guess it's time to sign off. See you again next week For you Hockey fans out there the season is almost started better get your lazy boys checked out.
Harold
No comments:
Post a Comment