Actually had a couple of good days working around the shop and the house. I believe I've reached the stage where the wood patterns for the shelf supports are as good as they need to be. All thats left is to put a few coats of shellac on the patterns. I'll attach a few pictures showing some of the work stages. First picture will show gluing the curved back onto one piece. Next picture will show gluing the two pieces together to form one half of the pattern. The third picture will show adding some stiffeners in and the last picture will show the filler used to fill in the corners and round out some areas for the taper required on the pattern. Next week I hope to have a few pictures of the completed pattern after the shellac has been applied.
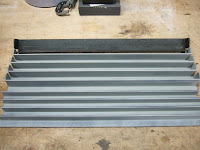
Over the last two days I started working on the rails that are required for the collet tray to ride on. I'm making two sets since Bruce in Toronto would like a set for his lathe as well. First thing I needed to do was pull off one sample from my #39 to use as a template for the parts. The rail is made of two pieces of angle iron one 3/4" by 3/4" and the the other 1" by 1". After cutting out the pieces to the appropriate length and bending tabs over on the 1 by 1's I had the pieces needed. Here's a couple of pictures showing the parts laid out and closeups of the riveting they did to mechanically fasten the two pieces together.
Now I thought about just welding the parts together but to try and be as historically correct as possible I decided to rivet the pieces together just like the original. After spending some time on the Web trying to find places that sold rivets that would be usable and could be shipped easily I gave up and decided to make my own rivets. Went down to the local Canadian Tire store and picked up a length of 3/16" and 1/4" rod. After I got them home looked at the originals and decided that the 3/16" was the size required. Figured out I would need 1/4" of grip length and 1/4" of stickout to make the tail. So picked up a piece of Scrap cast iron I had in the garbage bin and drilled a countersunk hole to use to form the rivets. Drilled a small 3/32" hole in the bottom to be able to push out the rivet once formed. Cut 22 pieces of the 3/16" rod 11/16" long to make the rivets. Then using a cheap Mapp gas/Oxygen torch heated the rivet up to cherry red and then pounded the top down while in the hole in the cast iron to form the countersunk head of the rivet. Here is a picture of one rivet and the rivet former and then all 22 rivets that were formed. This gave me two spares.
Now they are not perfect as you can see but I'm sure they'll work for my project. Due to the nature of the cast Iron I needed to drill three holes to use as forms as the countersunk area was getting damaged after 5-8 rivets. While they were cooling down I drilled and countersunk the rails to match the original. Then got out the torch heated up the tails and one by one pounded them down to rivet the two pieces together. Once all 5 rivets were in stalled carefully used an angle grinder and a die grinder to grind the countersunk heads down so they were flush with the rail face. Here are a couple of pictures showing the completed riveting job on one piece and then a closeup of the countersunk side after a quick coat of primer and then one more showing the completed first piece. Now only three more to go. Will have that done tomorrow morning in about 1hour.
Even though I did not have all the correct tooling it was still nice to see that once down it looked very similar to the original piece.
Well that's all for this episode see you again in another week of so.
Harold


No comments:
Post a Comment