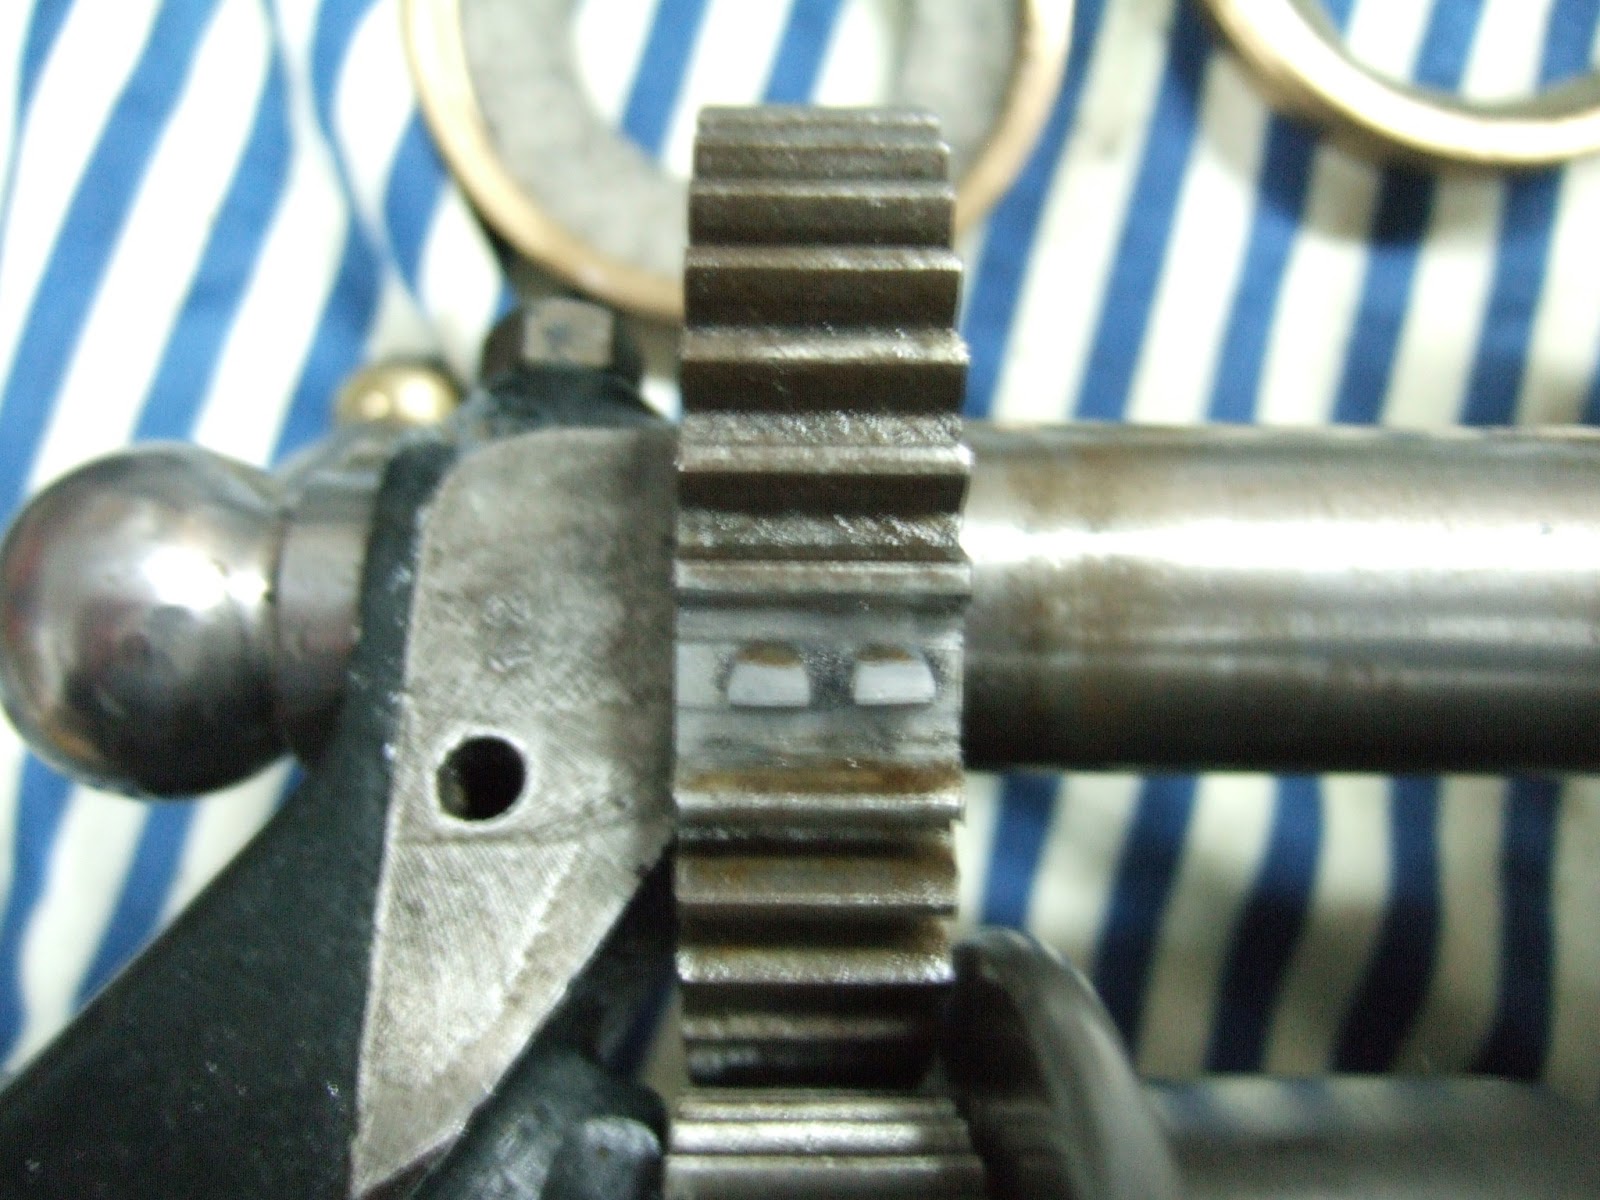
Well we're into April and the temps up here are finally going to start climbing. They say we should hit 15C by the middle of the week. This will definitely improve the working conditions in the workshop. Well I guess I should start by saying that the #39 Hardinge is back in action. I reassembled everything oiled it all up and ran it up. After 5mins no issues and the bearings were not getting to hot. So cross your fingers this will stay fixed for a long time. While I had it apart I decided to try and fix the broken gear tooth in the back gear assembly. One tooth had been broken off before I got this lathe and although the lathe worked I decided now would be the time to fix it. I used the method whereby you drill and tap a few holes to take a couple of small bolts. Loctite the bolt in the hole and then carefully grind and file it to the correct profile. Here are some photos showing the repair. First one shows the two holes drilled and tapped. Second picture shows the profile once filed from the side and the third picture shows the filed teeth from the top. Once I ran the lathe there was no noise from this repair and if anything there was less noise as it ran nice and smooth when the back gear was engaged. This also gave me practice for the work on the #86 lathe as it has a few broken teeth.
I also decided to machine another bolt for the pulley to headstock fixturing setup. As you can see by the picture below one of my original bolts did not have the complete tip to engage the hole in the headstock. So picked up some drill rod, turned it down, and made a new bolt. Here is the picture showing the 5 bolts including the bad one.
One other note, when I was running the lathe after repair the belt was quite a bit noisier than before. I previously had quite a bit of noise and managed to negate most of it by moving the upper pulley around. Unfortunately it cannot move any further and there was still noise. I remember somebody on one of the forums mentioning baby powder on these continuous rubber belts. Sprinkled a little baby powder on the belt and no more noise. So I guess the can of baby powder will stay close by in case the noise reappears. Once that was done I cleaned up the lathes covered them up and went back to working on the wooden pattern for the tray support bracket.
This pattern is definitely trickier than the last one I did however most likely still easier than the next one I need to do to make a pattern for the follower rest. So spent a few days fiddling with wood and glue to make up the bits and pieces and slowly start putting them together. I have most of the lower tray support done and it is mated with the part that has the holes that locate the mounting hardware. I am in the middle of gluing up the upper tray support which will then be mated with the lower support. When all is done there will be two halves of the pattern and the whole bracket will be split down the centre. When finished this will become clear. The first picture shows the upper shelf bracket clamped up while the glue dries, the original bracket is being used as weight. The lower bracket assembly is to the right in that picture and you can see the separation between the two halves. The second photo shows me holding the lower bracket assemblies roughly in the location where they will be so that you can see the pattern is slowly coming together. The third picture is just another view showing what the pattern will roughly look like once finished.


Well that's all for this week I hope you enjoy the coming week. There will most likely not be a weekly installment next week since I'll be visiting the parents however I hope to cross the border and head towards Rochester to look at another Hardinge QC headstock that we are aware of and that the owner wants to sell.
Harold


No comments:
Post a Comment